Create Bootable USB for Windows 11 in 5 minutes. Full Detailed Guide to create Bootable Pendrive for Windows 11. Today I will show you How to create windows 11 bootable usb drive. If you also want to create Bootable USB Drive in your computer. So, stay tune till the end. This process will work in every Windows like windows 7, windows 8, windows 8.1. I will show you each and every step which is needed to make Bootable USB. But you have follow the whole process as shown in this blog. If you miss any step then You can lose your Data and many more. So, Consider reading this blog starting to end.
How to create Windows 11 Bootable USB Pendrive
Step 1 : Download Rufus for USB Creation
First you have to download the Software Which is needed to make bootable usb pendrive. Rufus is the software which will help us to create bootable usb for windows 11 in few simple steps. You have to download the latest the version of Rufus which is 3.15. You can download it now By clicking on this Button. After clicking on this button, You have to wait for it to start Downloading.
Step 2 : Run the setup of Rufus
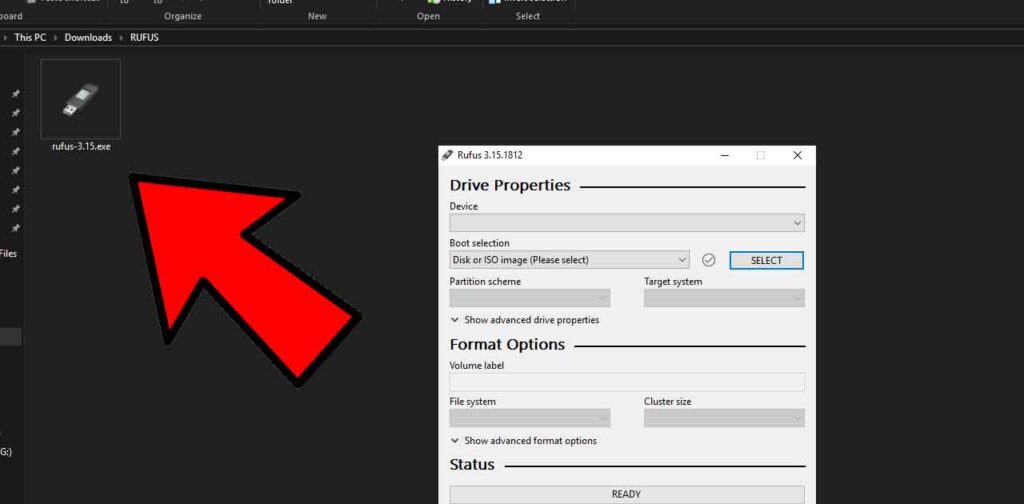
Once you have downloaded it. You have to go to the Downloads folder inside This PC. Then you need to run this Rufus setup. Just Double click on this setup and It will open up here something like this. Now here you need to follow my simple to create Bootable USB for Windows 11. You can also follow the same steps on Windows 10, 8.1, 7, Vista ect.
Step 3 : Plugin USB Drive
After that you need to plugin your USB Pendrive. Make sure your pendrive is minimum 8gb. If you have 4gb, You can’t create Windows 11 Bootable USB Pendrive. If you don’t have 8gb. Buy a new 8gb USB Drive. If you have 8gb or more. So, that’s good. Now you can create it right now. Just plug in USB pendrive to USB port in your computer or laptop. After inserting USB Drive. It will show up here in Devices section.
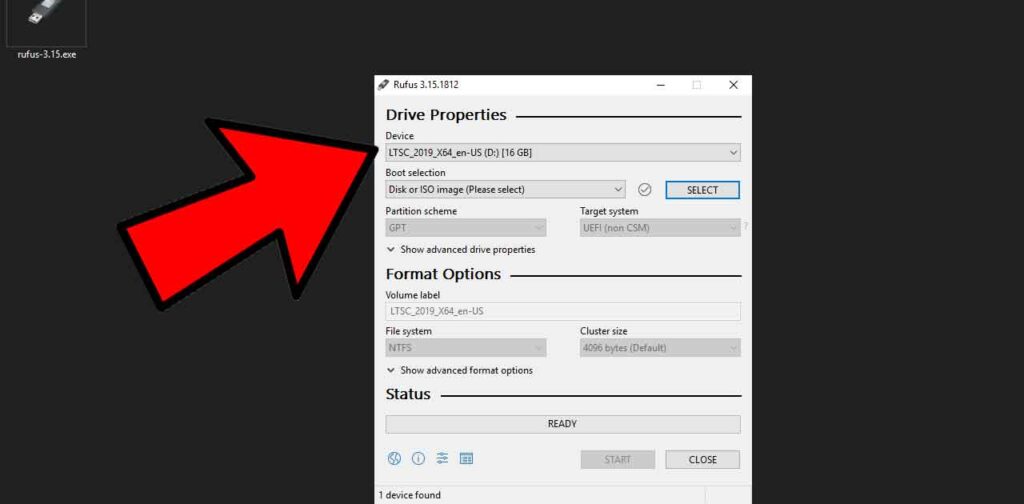
Now as you can see right there My USB Drive is showing here in Devices Section. You have to check your USB Drive Size here. In my Laptop It is 16gb. Now this the USB Pendrive that I wanted to make Bootable for Windows 11 installation. You have to Plug in that USB Drive which has no important Data available. Because Everything will be deleted when you make it Bootable. So, Backup and Copy all the Data before creating Bootable USB Drive.
Step 4 : Change some settings in Rufus
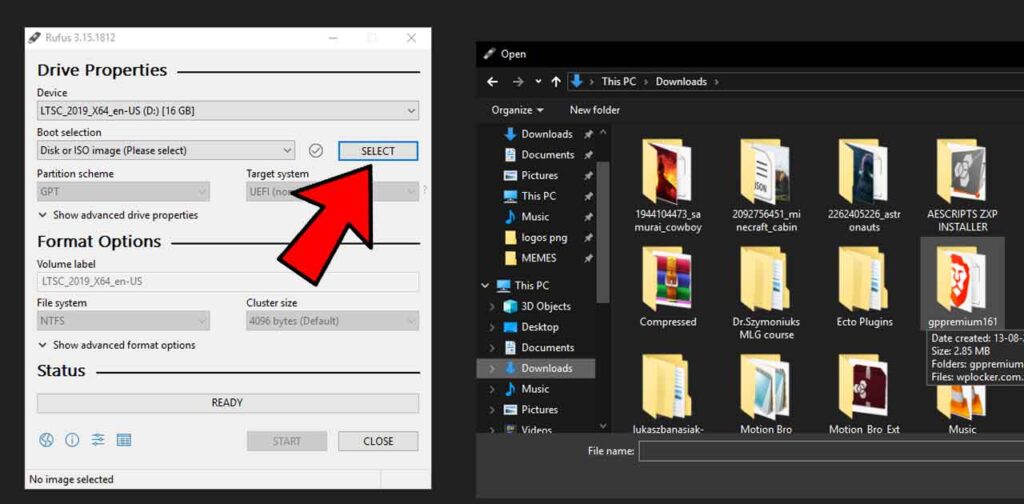
Once your USB Pendrive is showing in Rufus. Now You can jump into the next step. Next step is to Select the Windows 11 Iso File. You Already know about this “The Windows 11 is not launched officially”. Now You have to Download it. If you don’t have ISO file of windows 11. Don’t Worry About it. I will give you the link in the end of the Blog. Scroll down and Download it By just clicking on the Red Download Button. But If you have already, That’s great. Just You have to Click on the Select button right there. then Locate the ISO file Windows 11. Go to that Folder Where you have Downloaded then Select it and Click on Open.
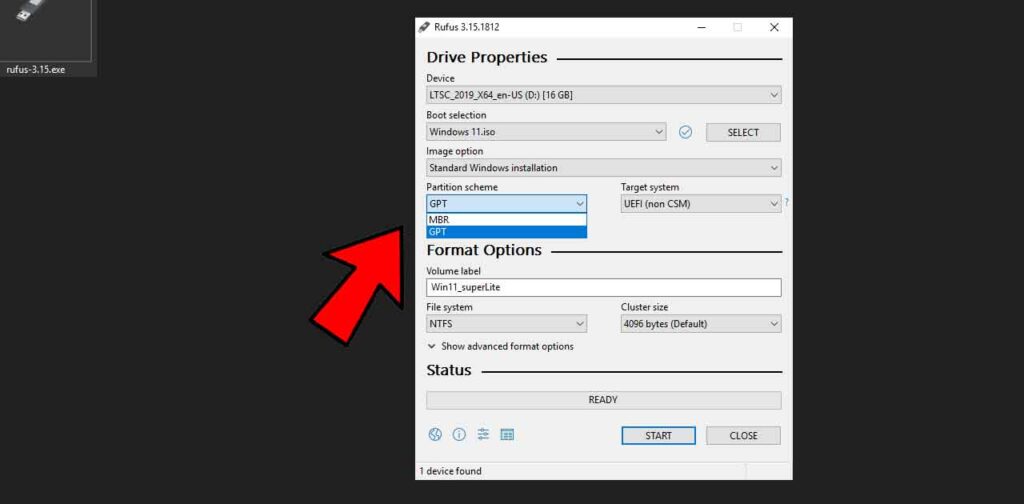
Now Once you have selected the Windows 11 ISO. Now you need to select the Parition Scheme. Which is GPT or MBR. If you don’t know What is GPT or What is MBR. Basically MBR Partition Scheme is used in Old Computers and GPT are coming in New Computers. If your Computer is older than 4 to 5 years. Definitely It have MBR Partition. But If your Computer is Based on New Architecture Definitely It have GPT Partition.
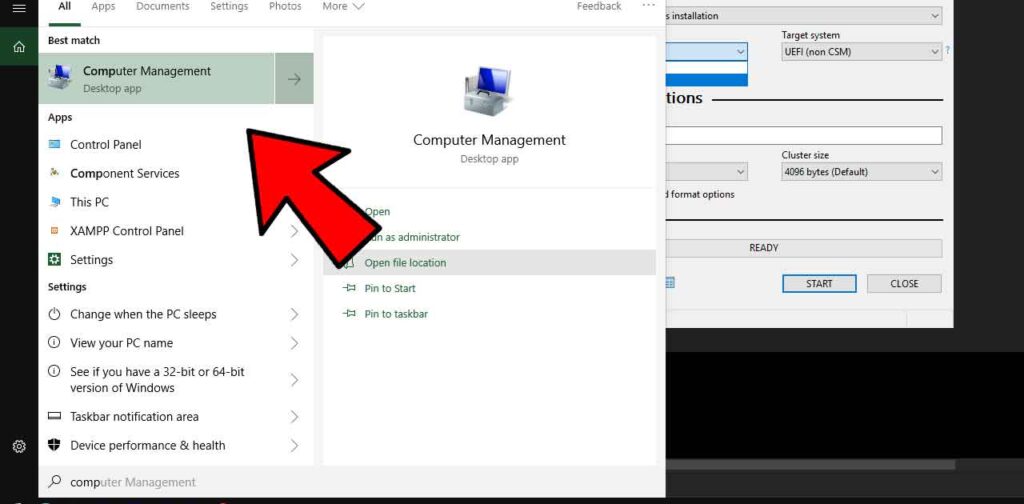
Now Let’s See. How to check Which Partition Scheme you have. To check You need to Click on Windows button and Search for Computer Management and Open It.
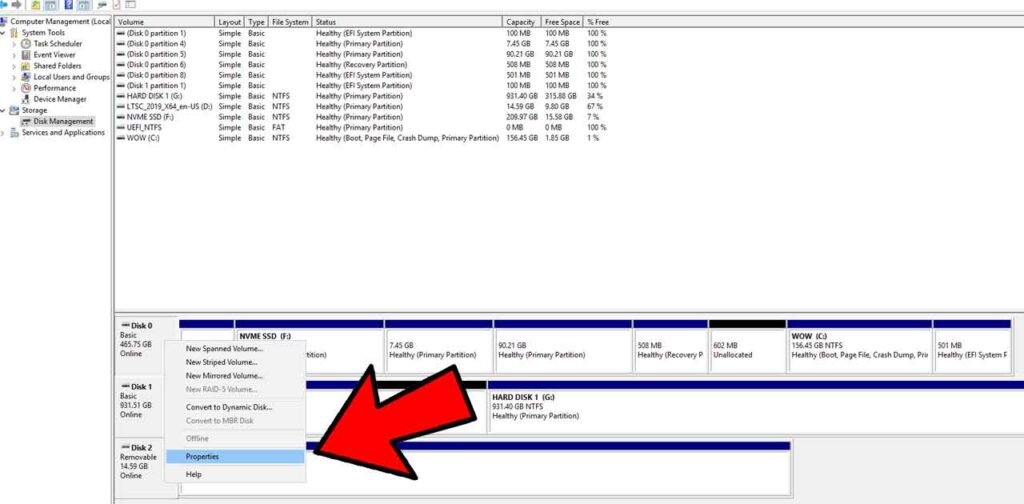
Then you need to Open Disk Management. Click on Disk Management to Open it. Now here you need to Right click on your Drive and You have to select Properties.
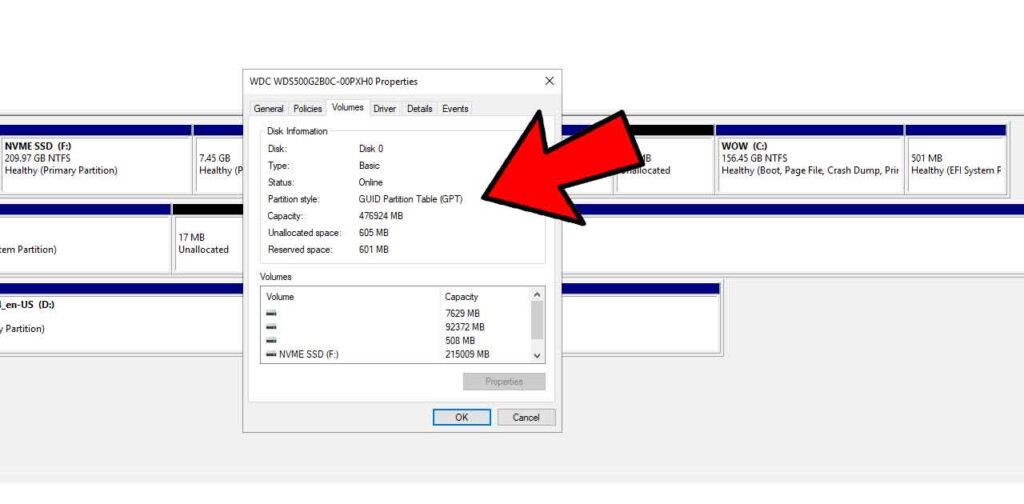
Then Click on Volumes and Check which is your Partion Scheme. In my Laptop it is GPT. Because My Laptop is not much old.
Now Go back there and Select the Partition Scheme of your Computer or Laptop. After Selecting it. Now you don’t have change any settings in Rufus. Now You just have to have to Click on the Start Button.
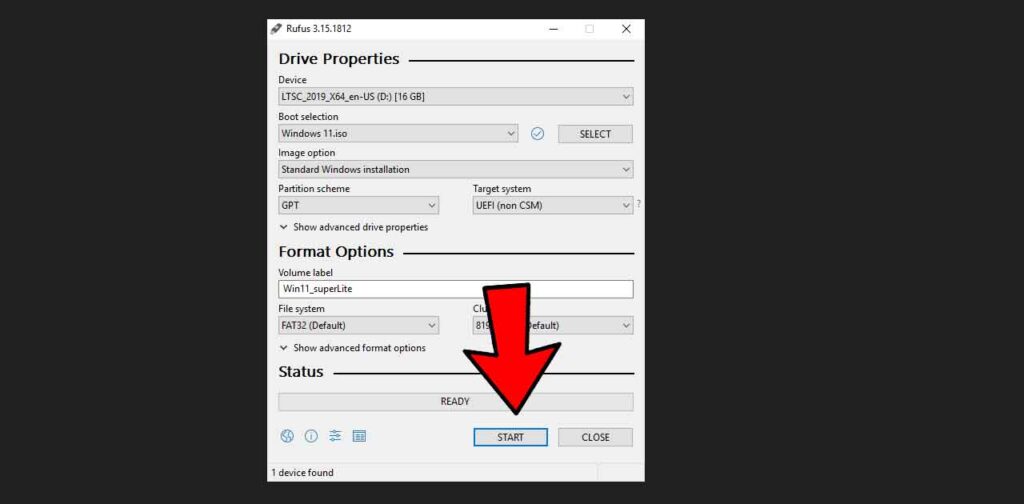
But Before that Remember again, Your All the Data inside the USB Drive will be deleted. So Make sure to Backup it and then Click on Start. When you click on it It Will give you some Warning about “All the Data on this will be Distroyed . To continue with operation, To Quit click CANCEL.
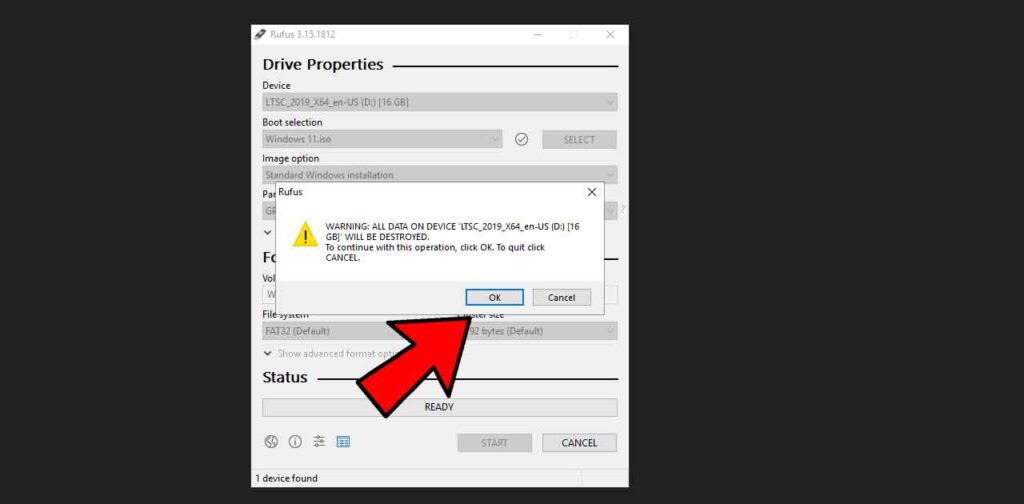
Step 5 : Start the process of creating Bootable Drive
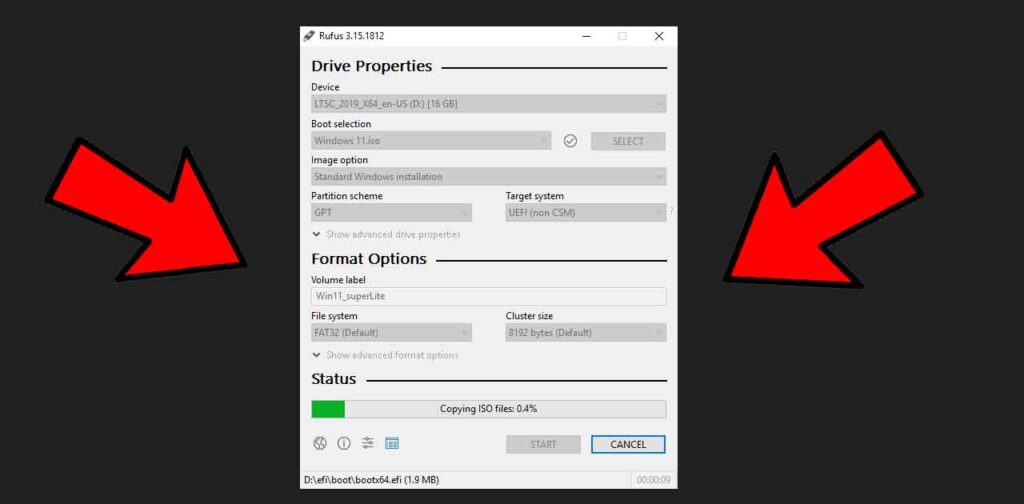
Now Once you clicked on OK. It will automatically Started converting USB Drive to Bootable USB Drive. Now what you need to Do is Wait. It depends on your USB Pendrive and on your CPU ,How much time will it take to Complete the whole process. While it is creating Don’t Unplug your USB Drive from your Computer. If you remove, It will break the process and show you some error.
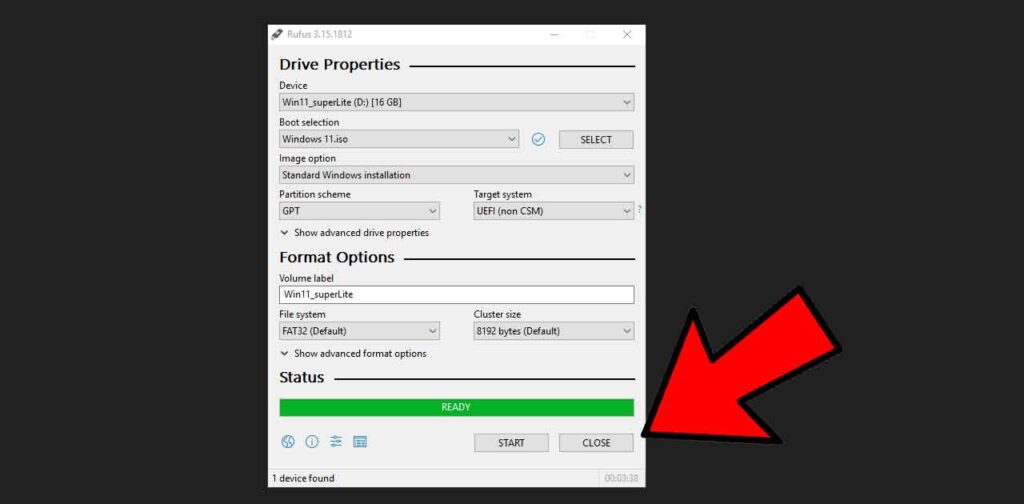
Now After Completing the Whole Process It will look like this. As you can see that It is showing me 2 buttons Start and Close. Don’t Click on Start. If you click it will restart the process again. But We Don’t want that again. But We want to close it. Just click on Close.
Now you have Successfully created the Windows 11 Bootable USB Drive. Now you can Boot with your USB Pendrive to Install Windows 11 in your computer.
Restart you Computer and Press your Setup key and Select your USB Drive and Install Windows 11 in your Computer. But If you have unable to make Bootable Drive So, You can contact me at vfxidmail@gmail.com
There are several ways to Contact me :- YouTube, Discord, Instagram and CONTACT PAGE. and If you want fast reply then you can leave a reply here on this Blog Post.